
Replacing the battery in the key
Note
- the information symbol illuminates and the message Car key battery low is shown in the driver display
- the locks repeatedly do not react to signals from the key within 20 metres (65 feet) of the car.
Note
Opening the key and changing the battery
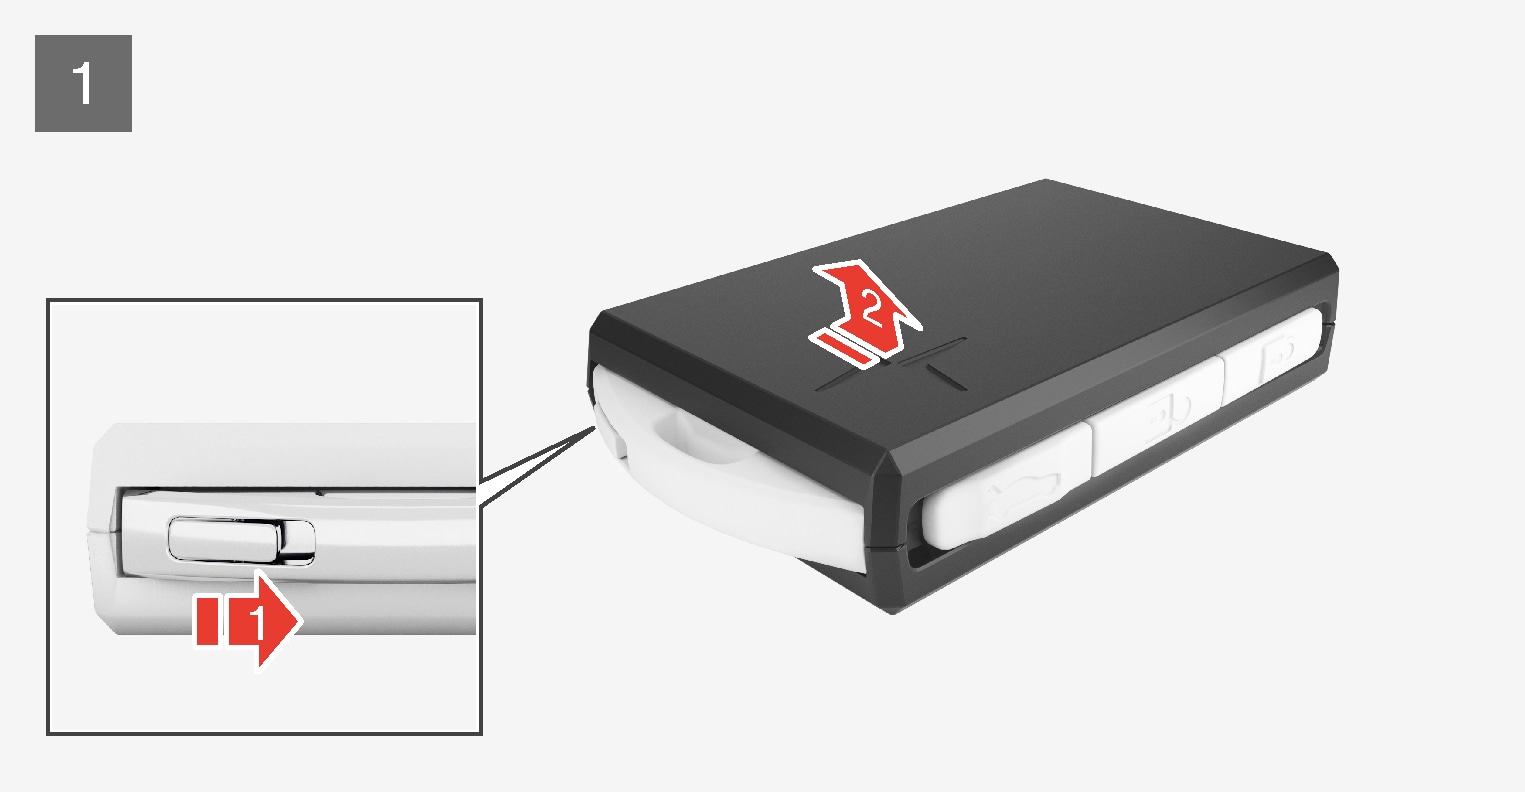

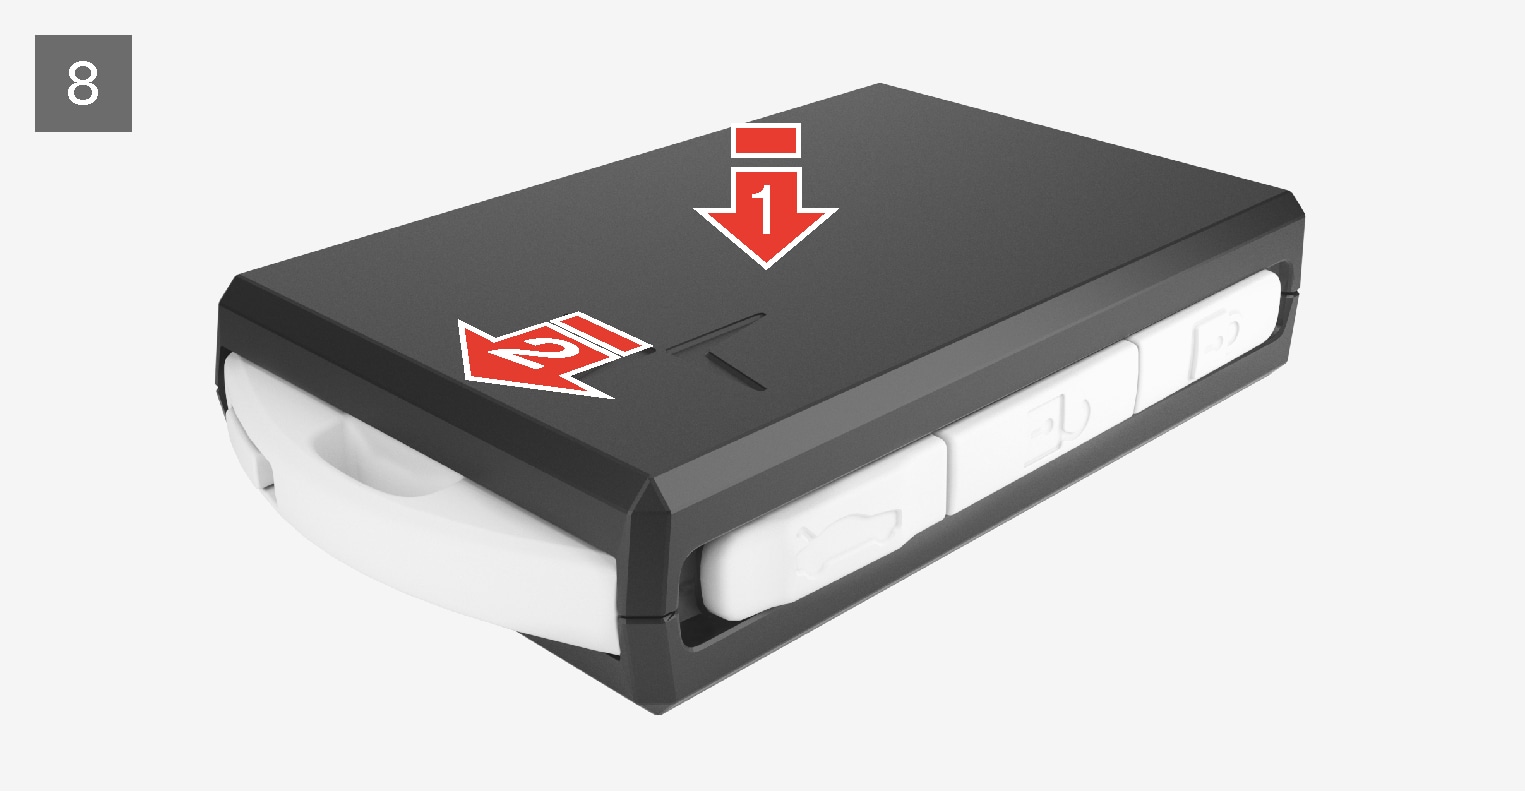
 Hold the key with the front visible and the Polestar logo facing the right way – slide the button at bottom edge by the key ring to the right. Slide the front side's shell a few millimetres upwards.
 The shell will then come free and can be lifted off the key.
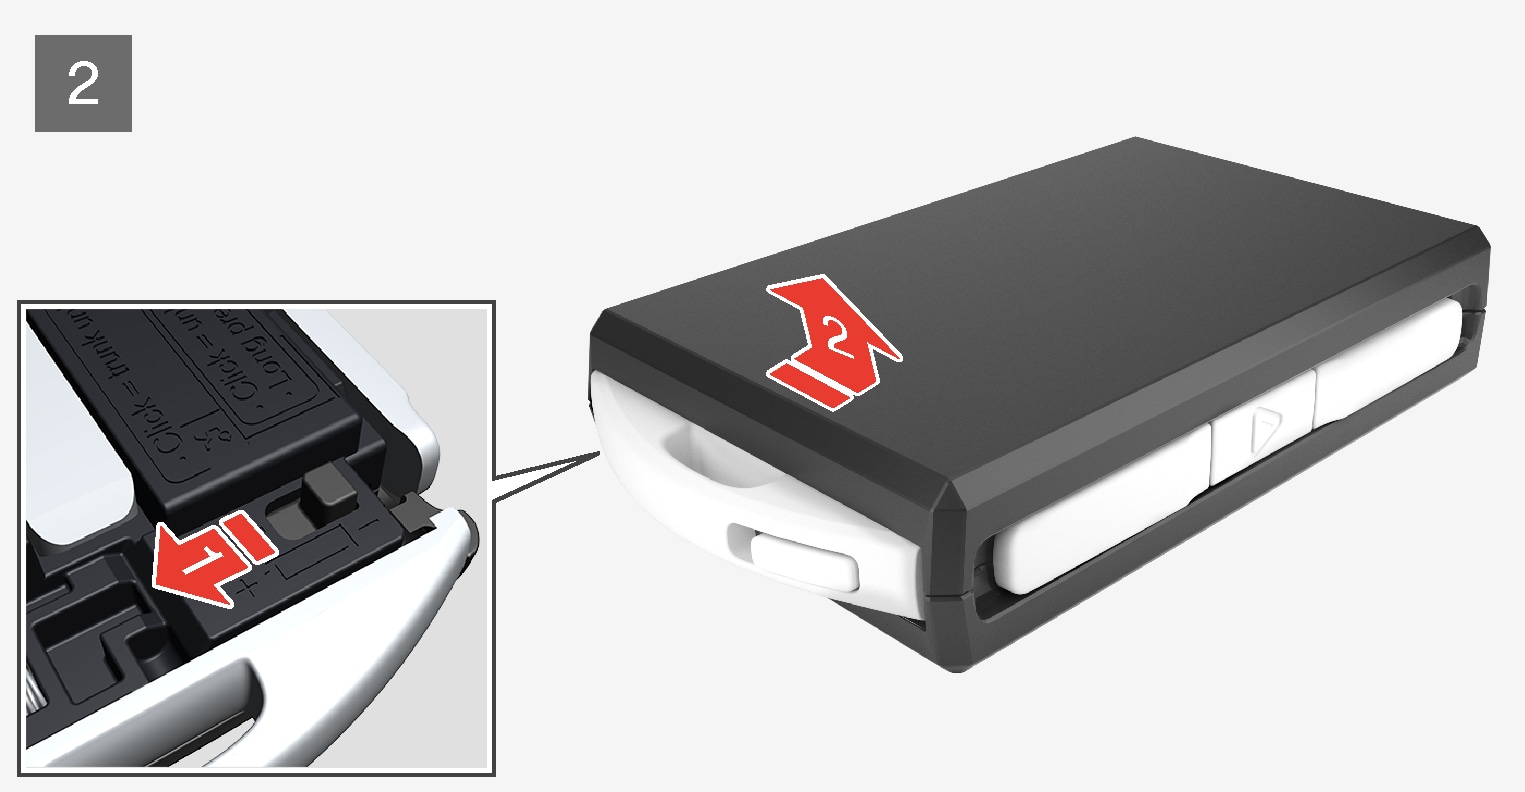

Turn the key, move the button to the side and slide the back shell a few millimetres upwards.
The shell will then come free and can be lifted off the key.
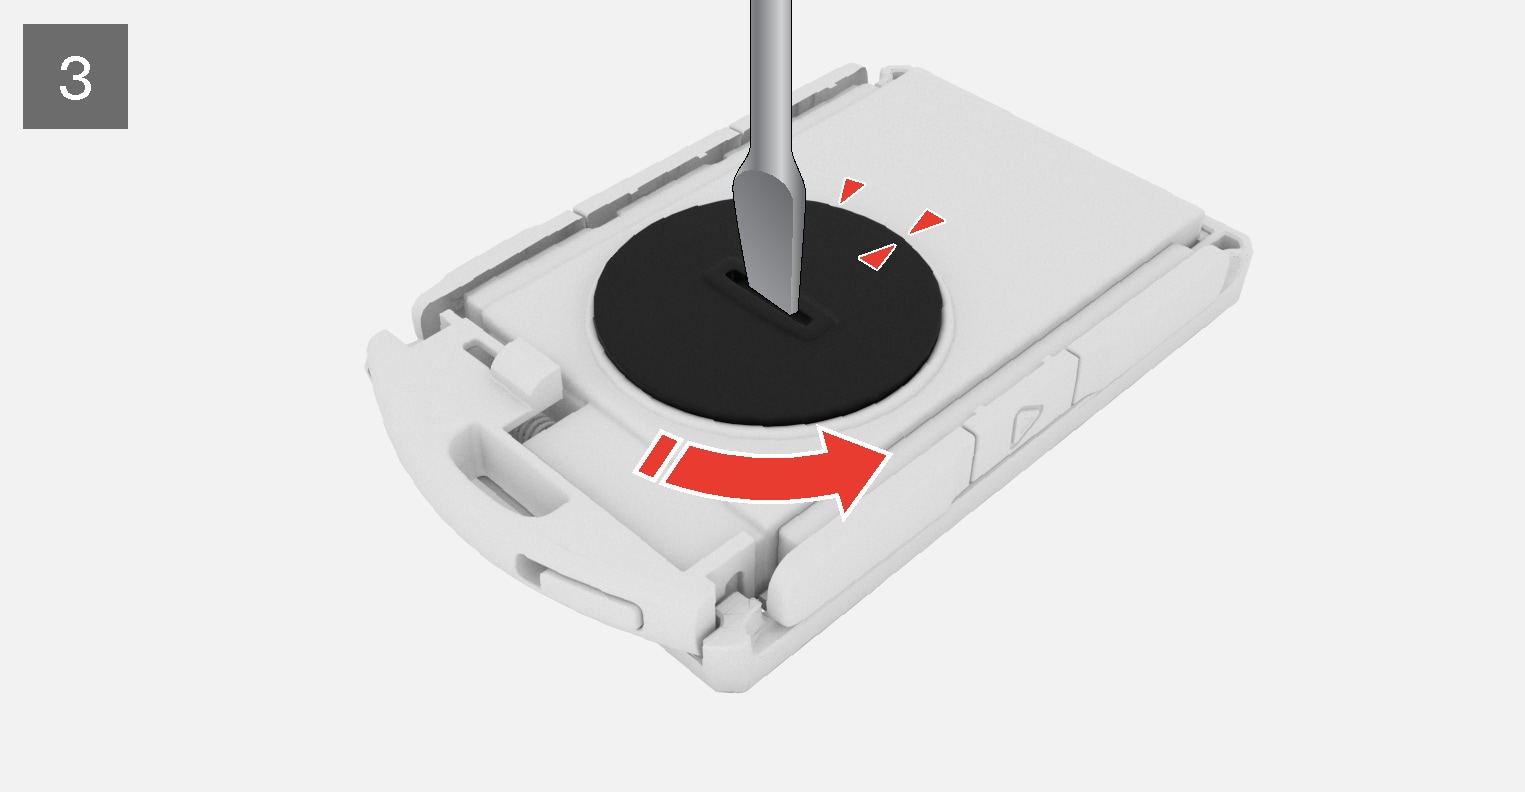

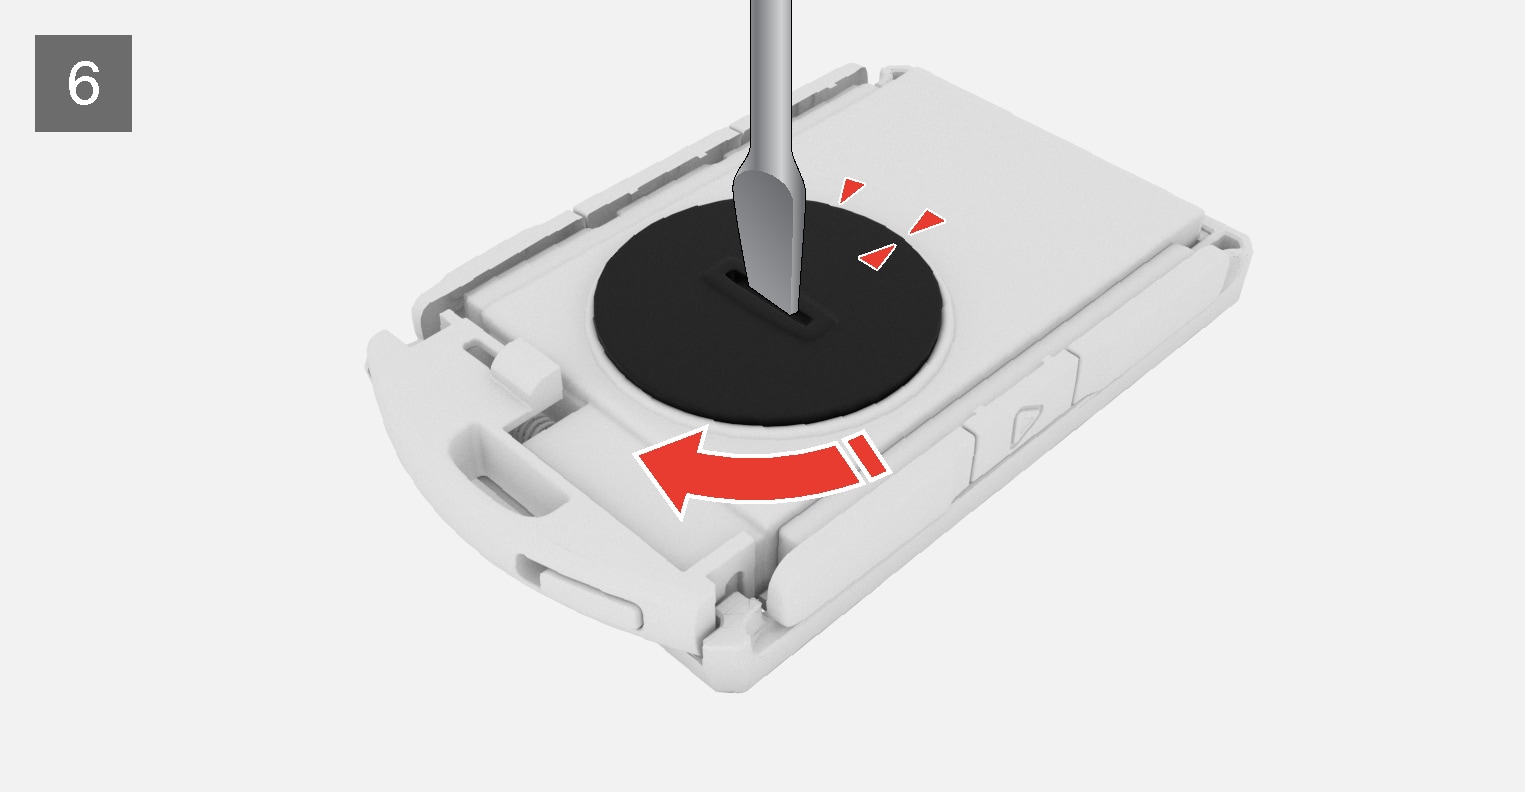
Use a screwdriver or similar to turn the battery cover anticlockwise until the markings meet at the OPEN text.
Carefully lift away the battery cover by pressing e.g. a fingernail into the recess.
Then prize the battery cover upwards.
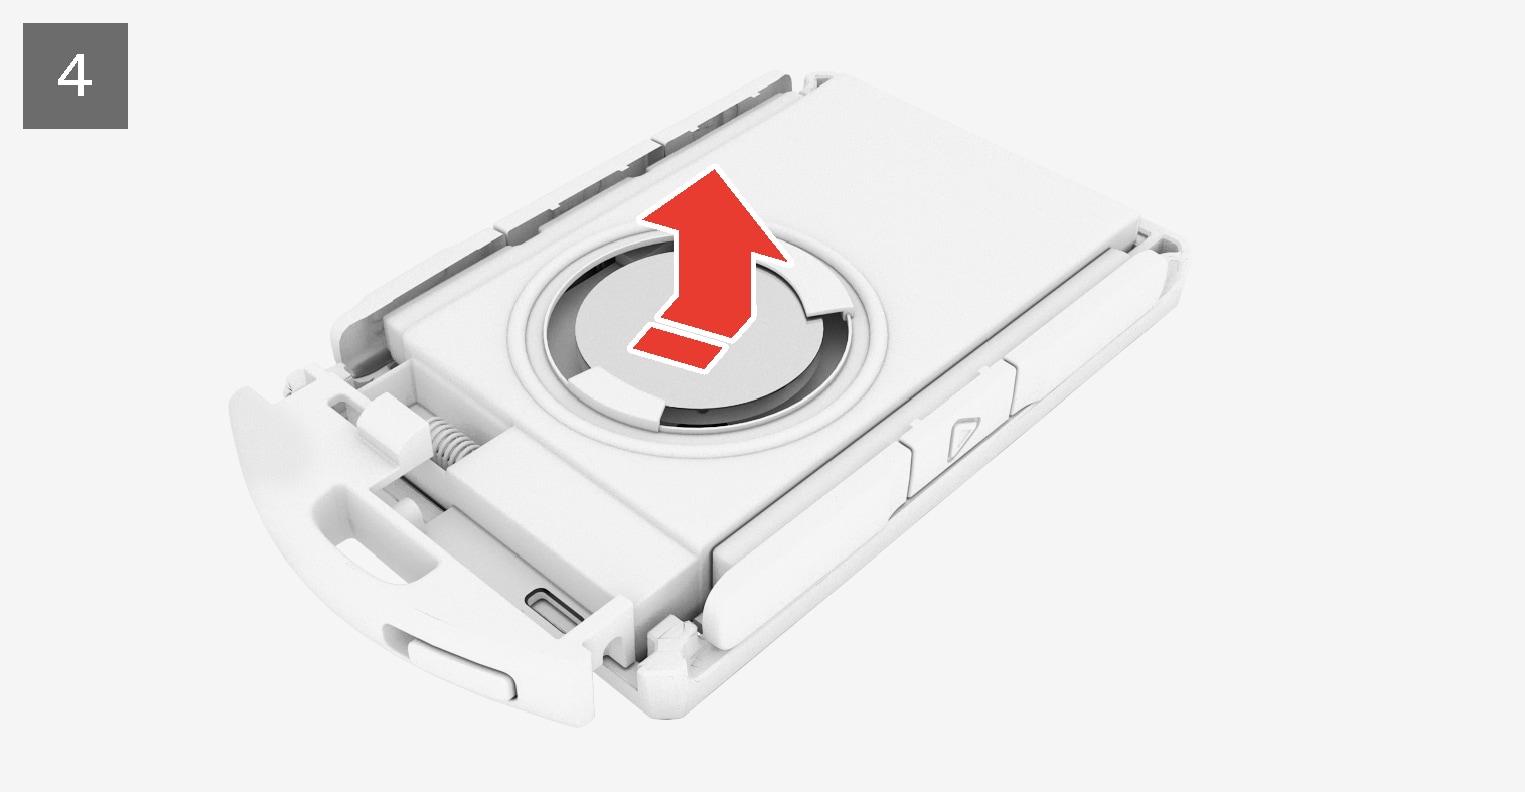

The battery (+) side is facing upwards. Then carefully prize loose the battery as illustrated.
Important

Install a new battery with the (+) side up. Avoid touching the key's battery contacts with your fingers.
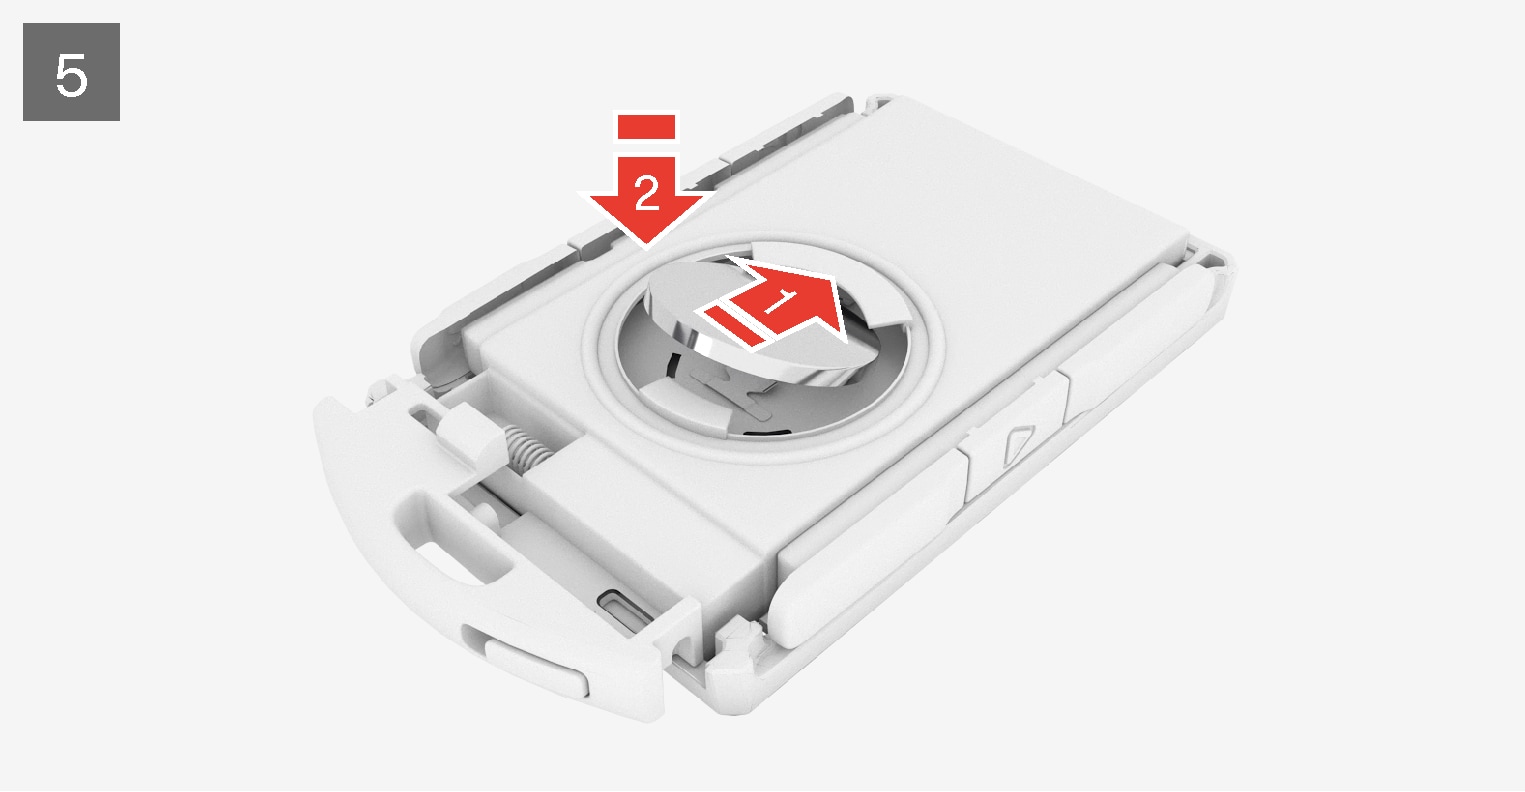
Place the battery in the holder with the edge down. Then slide the battery forwards so that it fastens under the two plastic catches.
Press the battery down so that it fastens under the upper black plastic catch.
Note
Note

Refit the battery cover and turn it clockwise until the marking aligns with the CLOSE text.

Reposition the rear side's shell and press it down until a clicking sound can be heard.
Then slide the shell back.

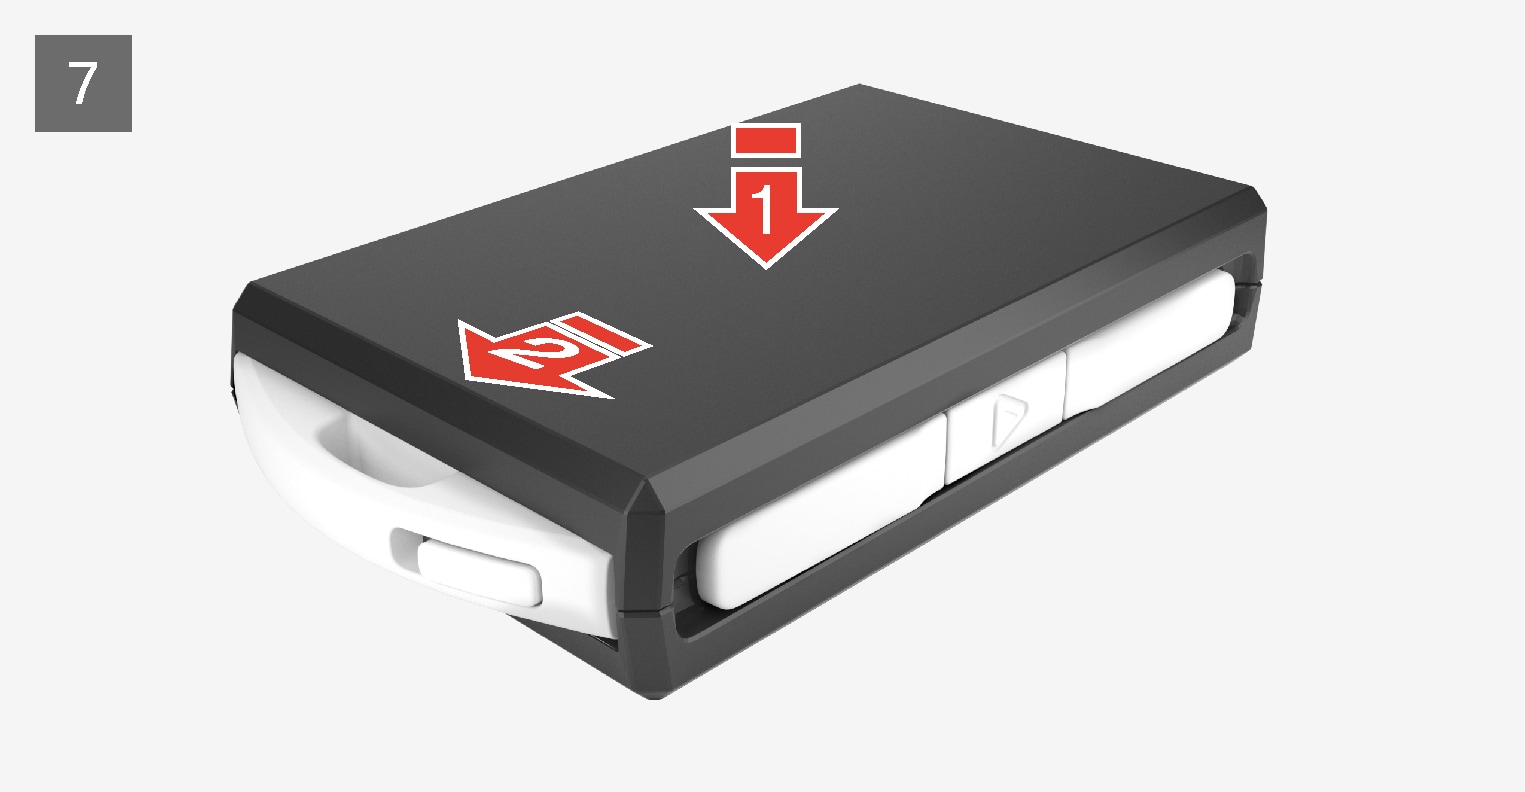
Turn the key over and refit the front side's shell by pressing it down until a clicking sound can be heard.
Then slide the shell back.