


Affixing new decals
Installing the performance software upgrade changes the total power output of the electric motors. New door decals with updated electric motor specifications and a decal for the vehicle's grille are included in the upgrade. We have compiled instructions on how to remove the current decals and affix the new ones as seamlessly as possible.
Removing
Protect the surface of the door with masking tape around the old door decal: top on the left, and the left and bottom edges of the decal.
Heat the decal for 30 seconds with a hair dryer. Lift one of the edges of the decal and gently pull it off the surface.
Affixing
Using the supplied isopropyl wipe, clean the surface of the door where the decal will be affixed.
Peel off the protective film from the back of the decal, starting from the left edge. Do not remove the protective film all at once. Do it a little at a time to avoid touching the adhesive surface.
Affix the decal in the same position as the old decal by aligning it using the tape you used when removing the old decal. Affix the decal slowly and carefully using a plastic scraper or similar. Start at the left edge of the decal and continue with the rest of the surface while removing the remaining protective film. Be careful not to damage the color or text of the decal.
Remove the remaining protective film (the part with holes) and the masking tape.
If necessary, clean the door surface where the decal is affixed.
Avoid touching the self-adhesive surface of the decal, as this could reduce adhesion. The temperature of the door surface should be 18–35°C.
Affixing the decal on the vehicle grille
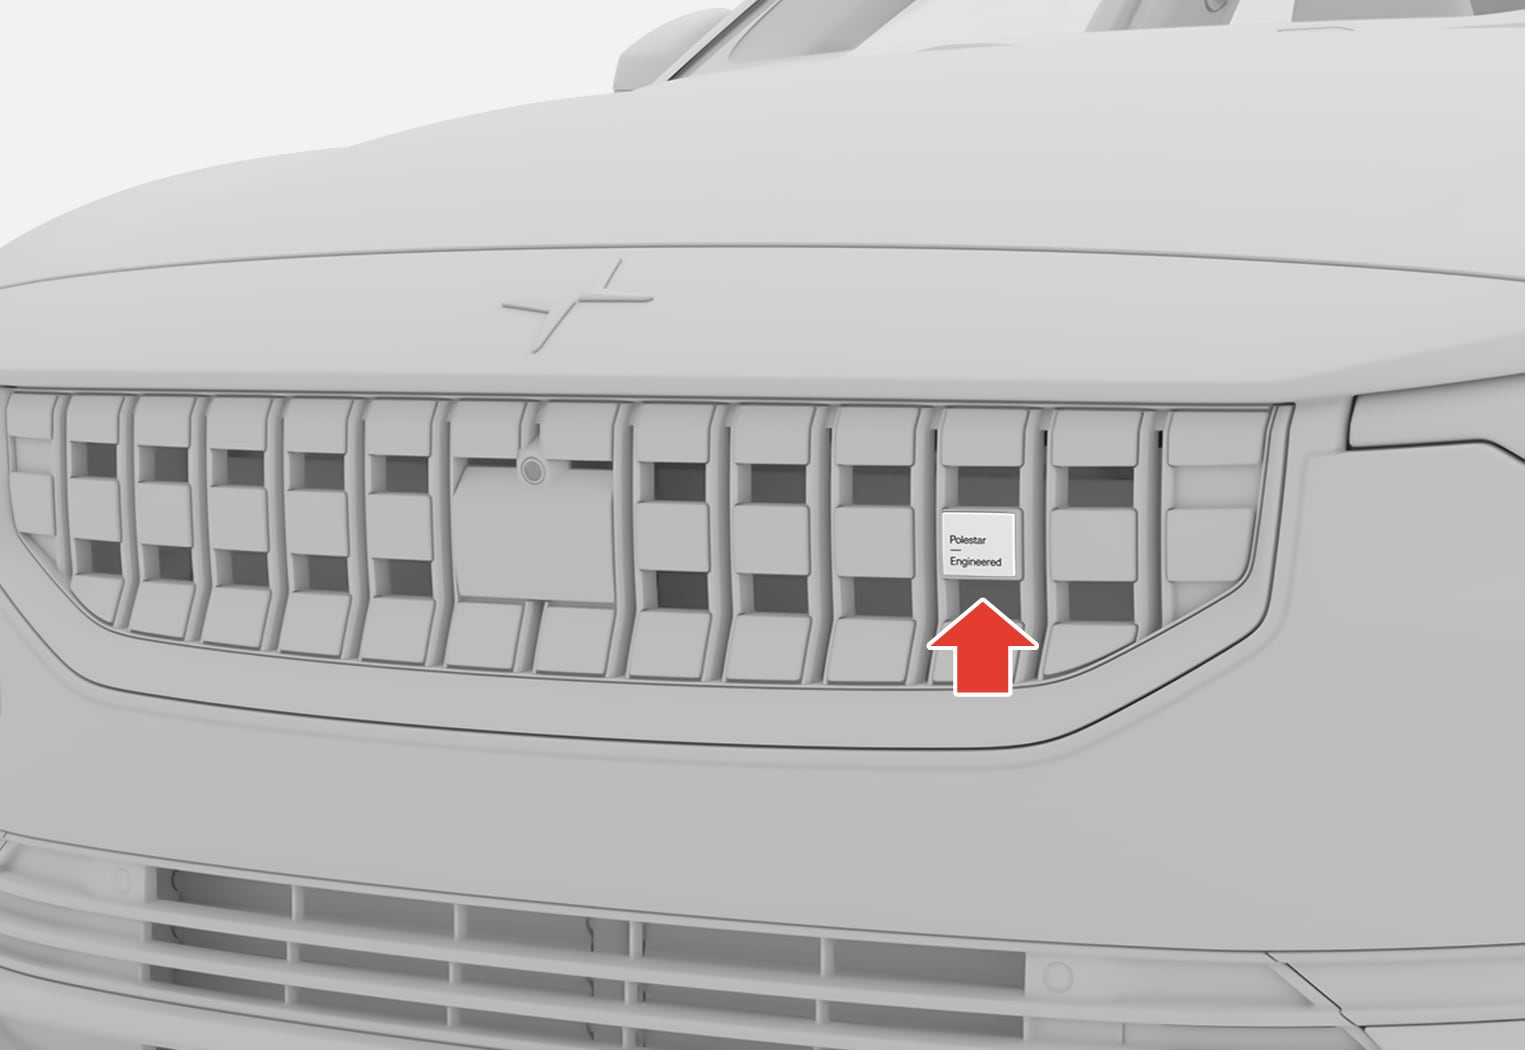
Clean the surface in the third square from the right in the center row of the grille. Use the supplied isopropyl wipe.
Remove the protective film from the back of the decal.
Place the decal in the correct position and press it against the surface.