


Changing wheel
Wheel changes must always be performed correctly. Instructions on how a wheel is removed and mounted and what is important to remember are provided below. Check that the tyre dimension is approved for use on the car.
Warning
- If a wheel must be changed in a trafficked environment, passengers must stand in a safe place.
- Use a jack1 designed for the car when changing wheels. Use supports to secure the car for all other work.
- Never crawl under the car or reach under with a part of your body when it is raised on a jack.
- Passengers must leave the car when it is raised on the jack.
Important
- Use a jack2 designed for the car. If a jack is included with the car, or is purchased as a spare part, it is only designed for occasional, short-term use, such as when changing a wheel after a puncture. If the car is to be jacked up more often, or for a longer time than is required just to change a wheel, use of a garage jack is recommended. In this instance, follow the instructions for use that come with the equipment.
- When the jack is not in use, it must be stored in the foam block in the front cargo area. The jack needs to be cranked together to the correct position in order to have space.
Removing a wheel
Read through the instructions below before you start. Take out the tools needed before jacking up the car. Use tools that are designed for your car model.
Activate the hazard warning flashers and set out a warning triangle if a wheel shall be changed in a trafficked location.
Ensure that the parking brake is activated.
Chock in front of and behind the wheels that remain on the ground. Use, for example, heavy wooden blocks or large stones.
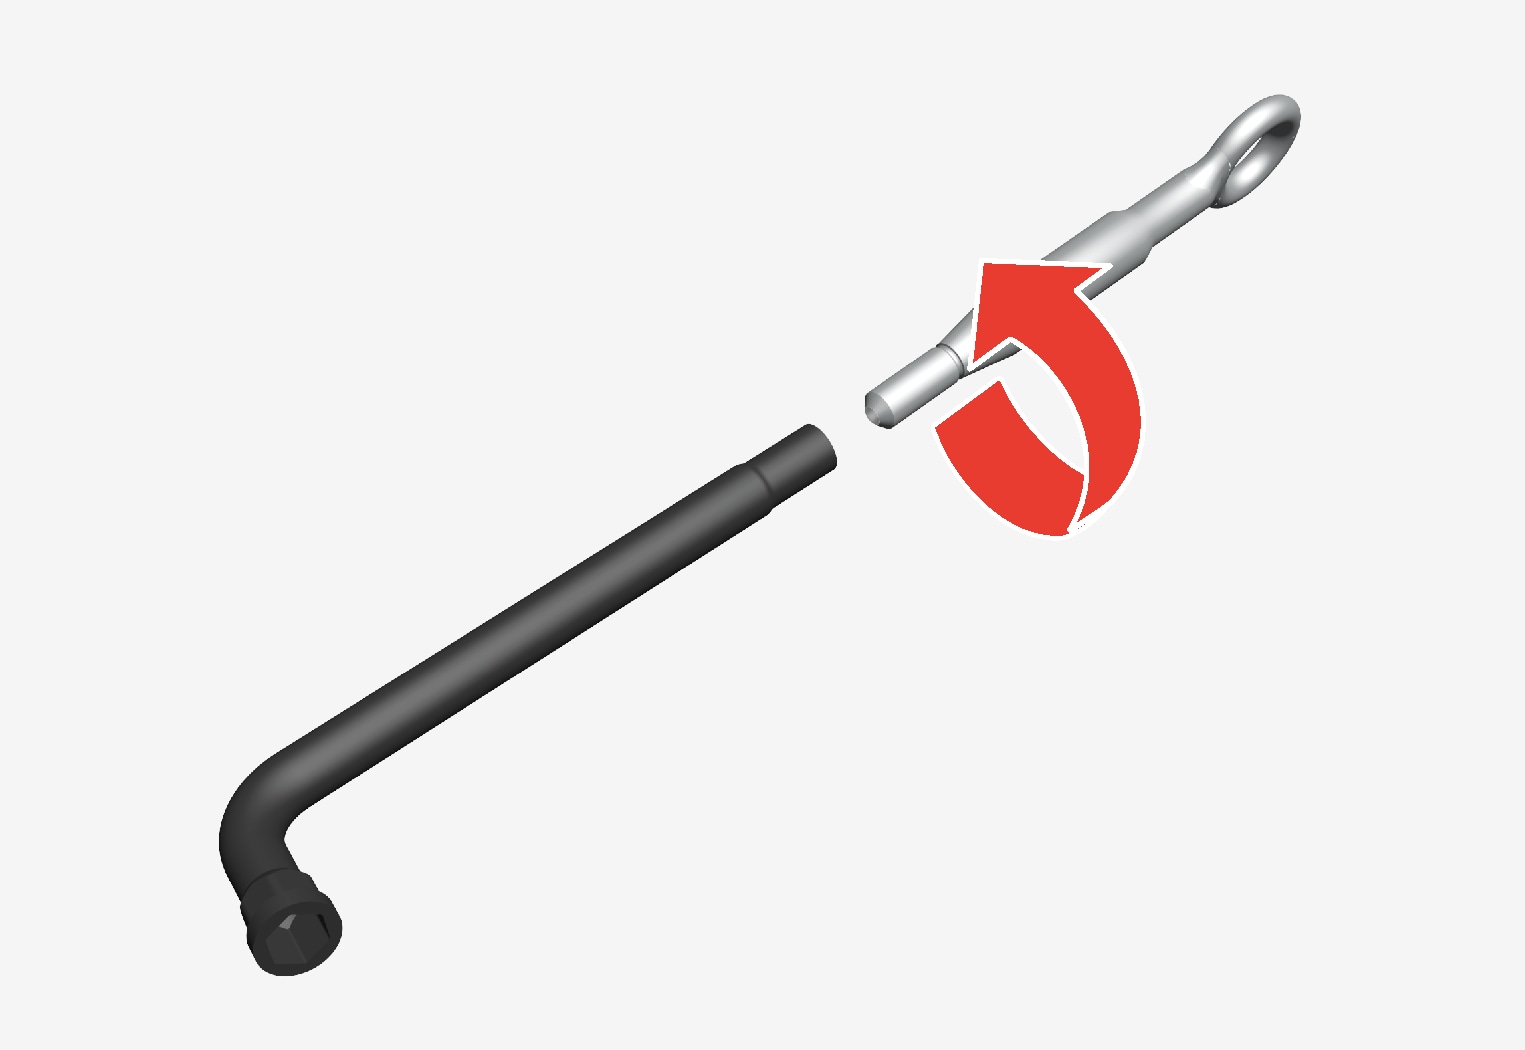
Screw together the towing eye with the wheel bolt wrench3 until the stop position. The towing eye must be screwed into the wheel wrench as far as it will go.
Depending on rim equipment:
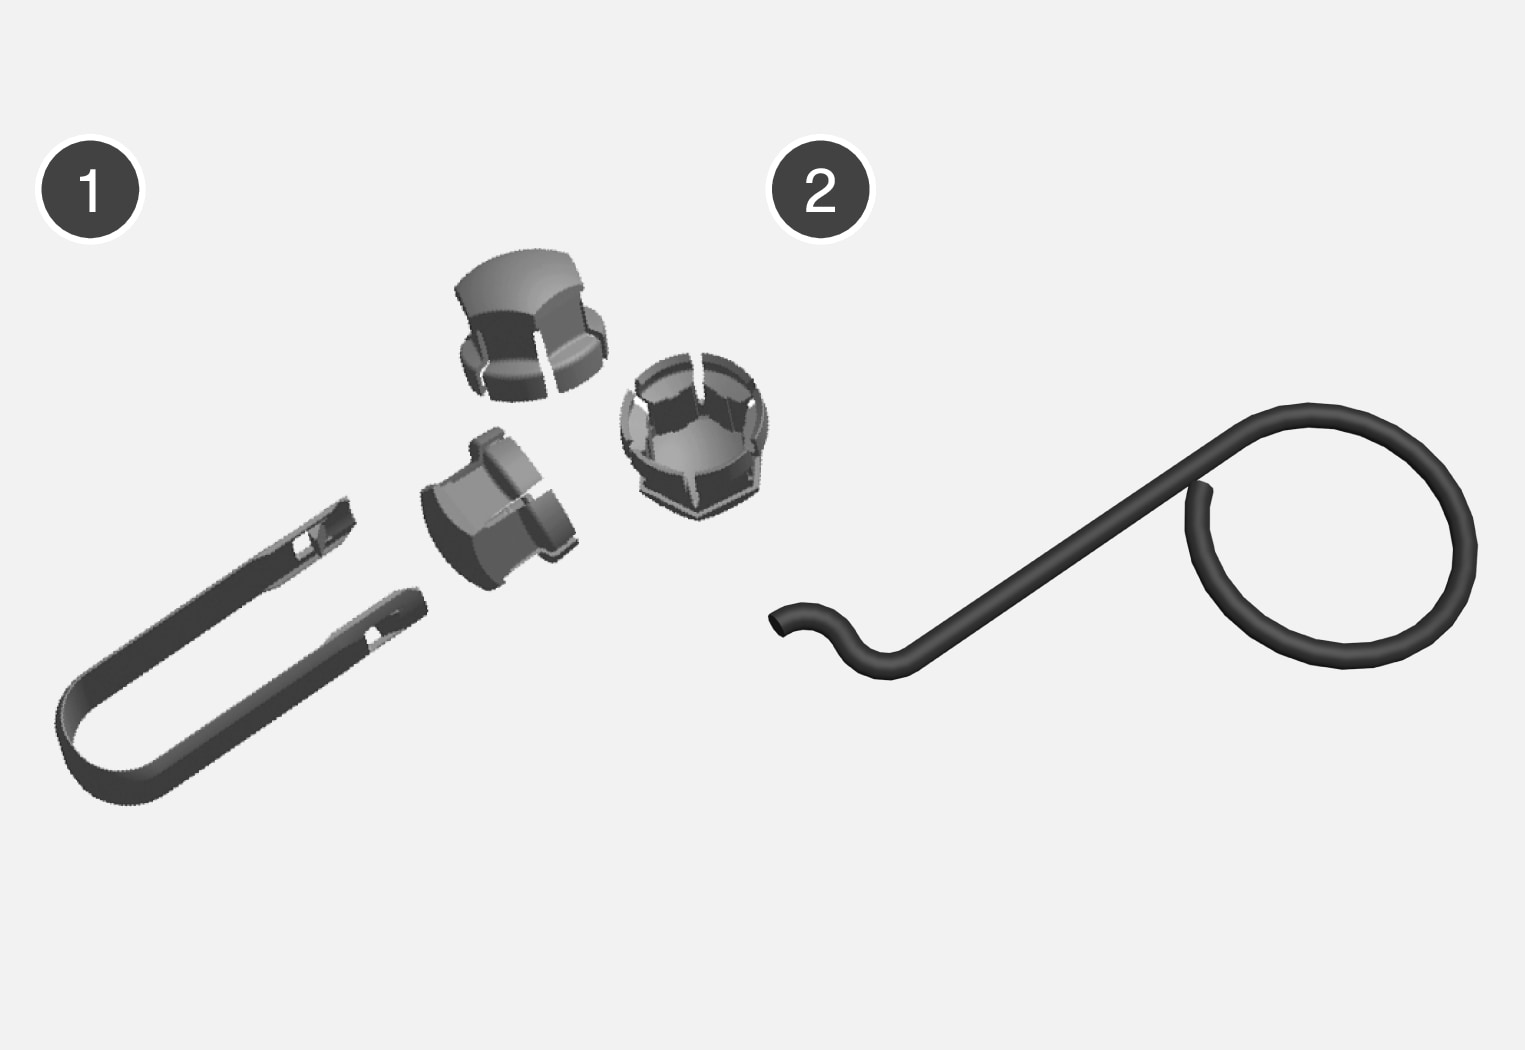
 Tool for removing the plastic caps on the wheel nuts.
 Tool for removing the wheel nut cap in the centre. Insert the tool into the hole in the middle of the wheel nut cap and pull to remove the cap.
With the car still on the ground, use the wheel bolt wrench/towing eye to undo the wheel bolts ½-1 turn by pressing downwards (anticlockwise).
Follow the instructions on how to jack up the car safely.
Raise the car high enough to allow the wheel to be removed to move freely. Remove the wheel bolts and lift off the wheel.
Mounting a wheel
The car needs to be raised high enough so that the wheel to be loosened can roll freely.
Clean the surfaces between wheel and hub.
Put on the wheel. Tighten the wheel bolts thoroughly.
Do not use lubricant on the threads of the wheel bolts.
Lower the car so that the wheels cannot rotate.
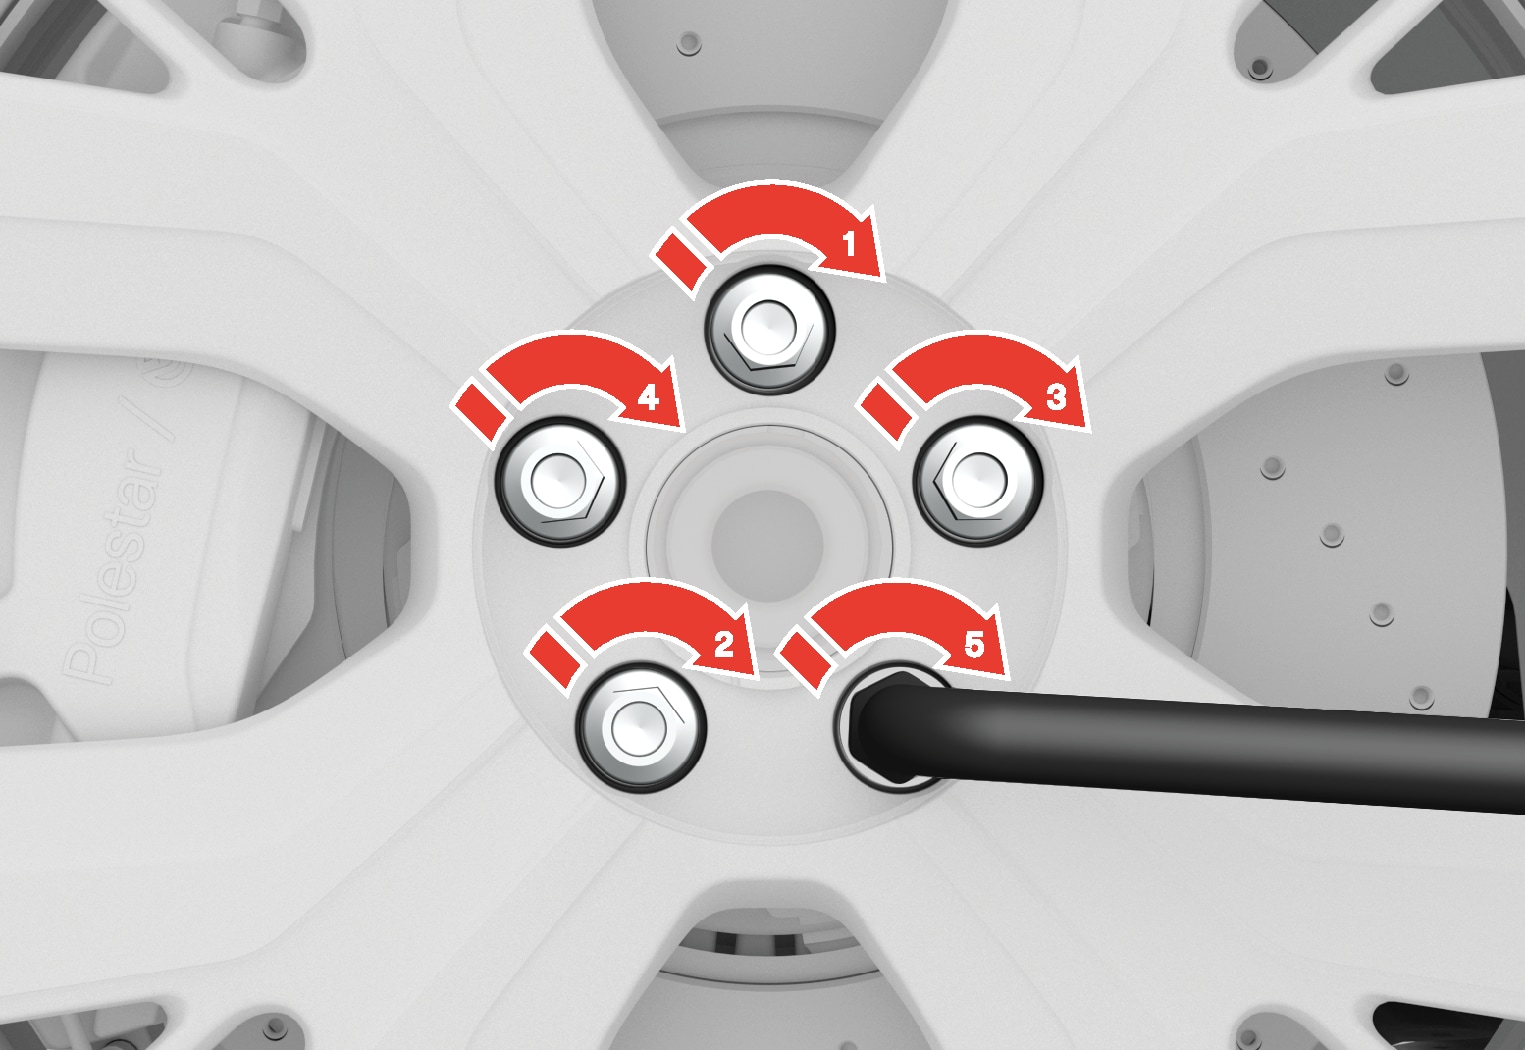
Tighten the wheel bolts crosswise. It is important that the wheel bolts are tightened properly. Tighten to 140 Nm (103 foot-pound). Check the tightening torque with a torque wrench.
Depending on tyre equipment:
- Place the wheel nut cap back over the wheel nuts by making sure it fits using guide markers, then press it into place.
- Refit the plastic caps over the wheel bolts.
Check the tyre pressure and save the new tyre pressure in the system for tyre pressure monitoring*.
Warning
The wheel bolts may need to be re-tightened several days after the change. Temperature differences and vibration may mean that they are not attached equally as tightly.
Note
- After a tyre has been inflated, always refit the dust cap in order to avoid damage to the valve from gravel, dirt, etc.
- Use only plastic dust caps or genuine Polestar dust caps.